DB를 운영하다 보면 개발자를 위한 SQL실행 환경을 제공할 필요가 있습니다.
실서비스DB는 일반적으로 DBA외에는 직접적인 SQL실행을 허용하지 않지만 테스트나 QA환경 같은 경우는 다수의 개발자들이 수시로 데이터를 확인해야 합니다.
SQL*Developer 같은 무료이고 좋은 툴도 있지만 DB로 직접 접속하는 클라이언트 툴이라 로컬 개발 환경이 아닌한 DB서버에 다수의 일반 개발자들이 직접 접속하도록 허용하지 않는 것이 보통입니다.
그래서 과거에는 웹기반의 iSQL*Plus 를 이용하여 게이트 역할을 하는 웹서버에서만 DB를 접근하고 개발자들은 웹브라우저에서 iSQL*Plus에 접속하여 데이터를 확인하기도 했었습니다.
그런데 11g 부터는 iSQL*Plus는 더이상 지원하지 않고 APEX(Application Express)를 사용해야 한다고 합니다.
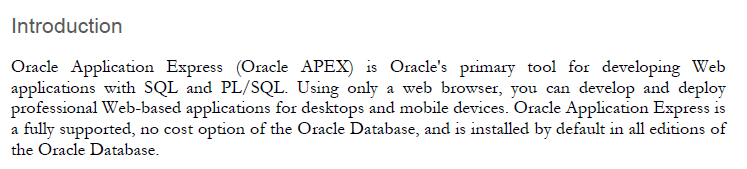
APEX 는 Oracle DB 를 이용하여 웹 어플리케이션을 쉽게 개발 및 배포하기 위한 웹 기반의 통합개발 및 협업 환경 툴입니다.
즉, SQL실행은 APEX 포함된 일부 기능이고 원래의 모든 기능은 분량이 꽤 많습니다. (검색하다 보면 APEX 관련 해외 도서도 심심치 않게 볼 수 있습니다. -관련도서-)
여기서는 SQL조회 환경을 구축하는 것에 포커스를 맞춰서 정리하였습니다.
기회가 되어 다른 기능들도 알아보면 간단히 모니터링 툴이나 기타 관리툴을 만든다던지 꽤 유용하게 사용할 수 있을 것 같다는 생각도 듭니다.
그리고 중요한 건 APEX는 공짜라서 마음껏 써도 됩니다. :)

SQL조회 환경을 구축하기 위해서 다음 사항들을 중요하게 생각했고 그에 맞는 기능들을 찾아서 아래와 같이 적절히 사용했습니다.
- 사용자 및 권한 관리 기능 : APEX 에서 지원
- 부서별 접근 데이터(스키마) 관리 : APEX에서 가능
- 리소스 과점유 방지 : Oracle Resource Manager 기능 활용
- 데이터 유출 위험 제거 : Oracle Data Redaction 기능 활용 (11.2.0.4 이상)
제작년 APEX 4 버전 부터 시작해서 작년 APEX 5 버전으로 업그레이드 하고 지금까지까지 약 2년 넘게 사용해본 바로는 기본적인 기능 및 관리적인 부분도 편리하여 만족스러운 것 같습니다.
설치에 앞서 APEX 아키텍처를 살펴보면 다음과 같습니다.

SQL을 실행할 대상DB에는 APEX 스키마가 설치되어 있어야 하며 DB가 여러대라면 각각의 DB인스턴스에 모두 설치해줘야 합니다.
그리고 Oracle Rest Data Service (ORDS) 를 어플리케이션 서버 에 설치하는데 ORDS 는 JAVA로 개발된 웹 어플리케이션으로 과거 4 버전 까지는 APEX Listener 라고 했었고 5버전 부터 ORDS 라고 이름이 바뀌었습니다.
검색하다가 APEX Listener 라고 보이면 ORDS와 같은 것으로 이해해도 괜찮을 것 같습니다.
APEX는 공짜라고 좋아했는데 그림에서 WebLogic 을 보는 순간 별로 의미없다는 생각이 들수도 있겠으나 WebLogic 없이 독립모드(Standalone mode)로도 구동 가능합니다.
동시사용자가 많은 상황에서는 독립모드는 부적합하겠으나 개발자를 위한 SQL조회 환경을 제공하는 정도라면 독립모드로도 충분합니다.
그러나 독립모드는 https를 지원하지 않는 제한이 있습니다.
저 같은 경우는 개인정보 보호 실태 조사를 했을 때 전송구간 암호화 조건을 충족하기 위하여 SE분의 도움으로 ORDS 앞단에 웹서버(apache)를 통하게 하여 https를 적용 하는 방법을 이용했었습니다.
테스트나 QA환경을 실서비스 데이터를 기반으로 구축한 경우는 전송구간 암호화 및 데이터 마스킹 기능도 중요하게 챙겨야 합니다.
여기서는 Standalone mode로 설치하며 설치 과정은 총 7단계로 정리하였습니다.
실서비스DB는 일반적으로 DBA외에는 직접적인 SQL실행을 허용하지 않지만 테스트나 QA환경 같은 경우는 다수의 개발자들이 수시로 데이터를 확인해야 합니다.
SQL*Developer 같은 무료이고 좋은 툴도 있지만 DB로 직접 접속하는 클라이언트 툴이라 로컬 개발 환경이 아닌한 DB서버에 다수의 일반 개발자들이 직접 접속하도록 허용하지 않는 것이 보통입니다.
그래서 과거에는 웹기반의 iSQL*Plus 를 이용하여 게이트 역할을 하는 웹서버에서만 DB를 접근하고 개발자들은 웹브라우저에서 iSQL*Plus에 접속하여 데이터를 확인하기도 했었습니다.
그런데 11g 부터는 iSQL*Plus는 더이상 지원하지 않고 APEX(Application Express)를 사용해야 한다고 합니다.
APEX 는 Oracle DB 를 이용하여 웹 어플리케이션을 쉽게 개발 및 배포하기 위한 웹 기반의 통합개발 및 협업 환경 툴입니다.
즉, SQL실행은 APEX 포함된 일부 기능이고 원래의 모든 기능은 분량이 꽤 많습니다. (검색하다 보면 APEX 관련 해외 도서도 심심치 않게 볼 수 있습니다. -관련도서-)
여기서는 SQL조회 환경을 구축하는 것에 포커스를 맞춰서 정리하였습니다.
기회가 되어 다른 기능들도 알아보면 간단히 모니터링 툴이나 기타 관리툴을 만든다던지 꽤 유용하게 사용할 수 있을 것 같다는 생각도 듭니다.
그리고 중요한 건 APEX는 공짜라서 마음껏 써도 됩니다. :)
SQL조회 환경을 구축하기 위해서 다음 사항들을 중요하게 생각했고 그에 맞는 기능들을 찾아서 아래와 같이 적절히 사용했습니다.
- 사용자 및 권한 관리 기능 : APEX 에서 지원
- 부서별 접근 데이터(스키마) 관리 : APEX에서 가능
- 리소스 과점유 방지 : Oracle Resource Manager 기능 활용
- 데이터 유출 위험 제거 : Oracle Data Redaction 기능 활용 (11.2.0.4 이상)
제작년 APEX 4 버전 부터 시작해서 작년 APEX 5 버전으로 업그레이드 하고 지금까지까지 약 2년 넘게 사용해본 바로는 기본적인 기능 및 관리적인 부분도 편리하여 만족스러운 것 같습니다.

그리고 Oracle Rest Data Service (ORDS) 를 어플리케이션 서버 에 설치하는데 ORDS 는 JAVA로 개발된 웹 어플리케이션으로 과거 4 버전 까지는 APEX Listener 라고 했었고 5버전 부터 ORDS 라고 이름이 바뀌었습니다.
검색하다가 APEX Listener 라고 보이면 ORDS와 같은 것으로 이해해도 괜찮을 것 같습니다.
그러나 독립모드는 https를 지원하지 않는 제한이 있습니다.
저 같은 경우는 개인정보 보호 실태 조사를 했을 때 전송구간 암호화 조건을 충족하기 위하여 SE분의 도움으로 ORDS 앞단에 웹서버(apache)를 통하게 하여 https를 적용 하는 방법을 이용했었습니다.
테스트나 QA환경을 실서비스 데이터를 기반으로 구축한 경우는 전송구간 암호화 및 데이터 마스킹 기능도 중요하게 챙겨야 합니다.
여기서는 Standalone mode로 설치하며 설치 과정은 총 7단계로 정리하였습니다.
지금은 5.0.3 버전까지 나와 있는데 여기서는 예전에 받아둔 5.0.1 버전으로 설치하였습니다.
testdb:/home/oracle/programs>ll
합계 186256
-rw-r--r-- 1 oracle dba 138044543 2015-07-23 10:49 apex_5.0.1.zip
-rw-r--r-- 1 oracle dba  52678336 2015-07-23 10:49 ords.3.0.1.177.18.02.zip
testdb:/home/oracle/programs>unzip apex_5.0.1.zip
..... 압축해제...
testdb:/home/oracle/programs>
testdb:/home/oracle/programs>
testdb:/home/oracle/programs>ll
합계 186260
drwxrwxr-x 6 oracle dba      4096 2015-07-06 06:01 apex
-rw-r--r-- 1 oracle dba 138044543 2015-07-23 10:49 apex_5.0.1.zip
-rw-r--r-- 1 oracle dba  52678336 2015-07-23 10:49 ords.3.0.1.177.18.02.zip
testdb:/home/oracle/programs>
testdb:/home/oracle/programs>
testdb:/home/oracle/programs>du -csh *
624M    apex
132M    apex_5.0.1.zip
51M     ords.3.0.1.177.18.02.zip
testdb:/home/oracle/programs>
testdb:/home/oracle/programs>
testdb:/home/oracle/programs>mv apex ../apex_5.0.1
testdb:/home/oracle/programs>
testdb:/home/oracle/programs>cd /home/oracle/apex_5.0.1/
testdb:/home/oracle/apex_5.0.1>
testdb:/home/oracle/apex_5.0.1>ll
합계 560
-rw-r--r--  1 oracle dba   1593 2014-12-11 15:54 apex_epg_config.sql
-rw-r--r--  1 oracle dba   2205 2014-12-04 16:52 apex_epg_config_cdb.sql
-rw-r--r--  1 oracle dba   9166 2015-03-04 05:02 apex_epg_config_core.sql
.......
.......
.......
-rw-r--r--  1 oracle dba  15344 2015-06-21 01:52 devins.sql
-rw-r--r--  1 oracle dba   2166 2015-02-27 14:29 endins.sql
drwxrwxr-x 33 oracle dba  36864 2015-07-06 06:00 images
-rw-r--r--  1 oracle dba   3214 2014-09-20 18:36 load_trans.sql
drwxrwxr-x  6 oracle dba   4096 2015-07-06 06:00 utilities
testdb:/home/oracle/programs>
testdb:/home/oracle/programs>
압축을 푼 설치파일을 적절한 경로로 옮기고 해당 경로로 이동합니다.
여기서는 /home/oracle/apex_5.0.1 입니다.
testdb:/home/oracle/apex_5.0.1>
testdb:/home/oracle/apex_5.0.1>sqlplus '/as sysdba'

SQL*Plus: Release 11.2.0.4.0 Production on Fri Apr 8 00:15:31 2016

Copyright (c) 1982, 2013, Oracle.  All rights reserved.

Connected to:
Oracle Database 11g Enterprise Edition Release 11.2.0.4.0 - 64bit Production
With the Partitioning, Automatic Storage Management and Real Application Testing options

SQL> /* Full development environment */
SQL> !pwd
/home/oracle/apex_5.0.1

SQL>
SQL> @apexins.sql TBS_APEX TBS_APEX TEMP /i/
.. 생략 ..
.. 설치가 끝나면 SQL*Plus 프롬프트를 빠져 나온다.
.. SQL*Plus 다시 접속하여 생성된 스키마를 확인.
SQL> select username, default_tablespace, created, account_status, lock_date
from dba_users
where created > trunc(sysdate)
order by created;

USERNAME                  DEFAULT_TABLESPACE             CREATED             ACCOUNT_STATUS                   LOCK_DATE
------------------------- ------------------------------ ------------------- -------------------------------- -------------------
APEX_PUBLIC_USER          USERS                          2016-04-04 17:05:18 EXPIRED & LOCKED                 2016-04-04 17:07:01
APEX_050000               TBS_APEX                       2016-04-04 17:05:18 EXPIRED & LOCKED                 2016-04-04 17:07:01
FLOWS_FILES               TBS_APEX                       2016-04-04 17:05:18 EXPIRED & LOCKED                 2016-04-04 17:07:01
SQL*Plus 에 sysadmin 으로 접속하여 apexins.sql 를 실행해 주면 APEX 와 관련된 3개의 스키마가 생성됩니다.
apexins.sql 의 인자 정보는 다음과 같습니다.
@apexins.sql tablespace_apex tablespace_files tablespace_temp images
- tablespace_apex : APEX_050000 유저의 DEFAULT TABLESPACE 입니다. 여기서는 미리 생성해둔 TBS_APEX 를 사용했습니다.
- tablespace_files : FLOW_FILES 유저의 DEFAULT TABLESPACE 이며 마찬가지로 TBS_APEX를 사용했습니다.
- tablespace_temp : TEMPORARY TABLESPACE
- images : 웹서버의 이미지 가상 디렉토리 경로 입니다. 나중에 ORDS를 설치하고 이미지파일을 복사할때 이 경로대로 해야 합니다. (6번 과정)
2. APEX 어드민 인스턴스 생성 및 패스워드 설정
SQL> @apxchpwd.sql
================================================================================
This script can be used to change the password of an Application Express
instance administrator. If the user does not yet exist, a user record will be
created.
================================================================================
Enter the administrator's username [ADMIN]
User "ADMIN" does not yet exist and will be created.
Elapsed: 00:00:00.00
Enter ADMIN's email [ADMIN]
Enter ADMIN's password []
Created instance administrator ADMIN
Elapsed: 00:00:00.23
sysadmin 으로 접속한 상태에서 apexchpwd.sql 을 실행하면 어드민 계정을 생성하고 패스워드를 설정합니다.
나중에 운영하다가 어드민 패스워드를 잊어버렸을 때 이파일을 실행하면 패스워드를 다시 설정할 수 있어서 이 파일은 기억해 두는 것이 좋습니다.
3. APEX_PUBLIC_USER 설정
SQL> alter user APEX_PUBLIC_USER account unlock;
SQL> alter user APEX_PUBLIC_USER identified by "apex";
SQL> select username, created, account_status, lock_date
from dba_users
where created > trunc(sysdate)
order by 2;

USERNAME                  CREATED             ACCOUNT_STATUS                   LOCK_DATE
------------------------- ------------------- -------------------------------- -------------------
APEX_PUBLIC_USER          2016-04-04 17:05:18 OPEN
APEX_050000               2016-04-04 17:05:18 EXPIRED & LOCKED                 2016-04-04 17:07:01
FLOWS_FILES               2016-04-04 17:05:18 EXPIRED & LOCKED                 2016-04-04 17:07:01
APEX_PUBLIC_USER 의 LOCK을 풀고 패스워드를 설정합니다.
SQL> alter profile DEFAULT limit PASSWORD_FILE_TIME unlimited;
SQL> SELECT * FROM DBA_PROFILES;

PROFILE                        RESOURCE_NAME                    RESOURCE LIMIT
------------------------------ -------------------------------- -------- ----------------------------------------
DEFAULT                        COMPOSITE_LIMIT                  KERNEL   UNLIMITED
DEFAULT                        SESSIONS_PER_USER                KERNEL   UNLIMITED
DEFAULT                        CPU_PER_SESSION                  KERNEL   UNLIMITED
DEFAULT                        CPU_PER_CALL                     KERNEL   UNLIMITED
DEFAULT                        LOGICAL_READS_PER_SESSION        KERNEL   UNLIMITED
DEFAULT                        LOGICAL_READS_PER_CALL           KERNEL   UNLIMITED
DEFAULT                        IDLE_TIME                        KERNEL   UNLIMITED
DEFAULT                        CONNECT_TIME                     KERNEL   UNLIMITED
DEFAULT                        PRIVATE_SGA                      KERNEL   UNLIMITED
DEFAULT                        FAILED_LOGIN_ATTEMPTS            PASSWORD UNLIMITED
DEFAULT                        PASSWORD_LIFE_TIME               PASSWORD UNLIMITED
DEFAULT                        PASSWORD_REUSE_TIME              PASSWORD UNLIMITED
DEFAULT                        PASSWORD_REUSE_MAX               PASSWORD UNLIMITED
DEFAULT                        PASSWORD_VERIFY_FUNCTION         PASSWORD NULL
DEFAULT                        PASSWORD_LOCK_TIME               PASSWORD UNLIMITED
DEFAULT                        PASSWORD_GRACE_TIME              PASSWORD UNLIMITED
11g 부터는 default profile 의 PASSWORD_FILE_TIME 이 180 일입니다.
180일이 지나도록 패스워드를 바꿔주지 않으면 제대로 동작하지 않을 수 있으므로 DEFAULT PROFILE 의 PASSWORD_FILE_TIME 값을 UNLIMITED 로 변경하거나 별도 프로파일을 생성하여 지정하는 것이 좋습니다.
여기서는 편의상 DEFAULT PROFILE을 수정하였습니다.
4. APEX RESTful Service DB스키마 설치
SQL> @apex_rest_config.sql.. 생략 ..SQL> select username, created, account_status, lock_date from dba_users where created > trunc(sysdate) order by 2; USERNAME CREATED ACCOUNT_STATUS LOCK_DATE ------------------------- ------------------- -------------------------------- ------------------- APEX_PUBLIC_USER 2016-04-04 17:05:18 OPEN APEX_050000 2016-04-04 17:05:18 EXPIRED & LOCKED 2016-04-04 17:07:01 FLOWS_FILES 2016-04-04 17:05:18 EXPIRED & LOCKED 2016-04-04 17:07:01 APEX_REST_PUBLIC_USER 2016-04-04 20:31:53 OPEN APEX_LISTENER 2016-04-04 20:31:53 OPEN 5 rows selected.
1번 과정에서 압축해제한 설치파일 경로에서 apex_rest_config.sql 을 실행하면
APEX_REST_PUBLIC_USER 와 APEX_LISTENER 2개의 스키마가 생성됩니다.
생성 과정에서 DEFAULT TABLESPACE 는 미리 생성해둔 TBS_APEX 로 모두 지정하고 각각의 패스워드를 설정합니다.
이 패스워드는 바로 이어지는 ORDS 설치 시 입력해야 하므로 잘 기억해둡니다.
5. Oracle REST Data Service (ORDS) 설치 - Standalone Mode
ORDS Download 에서 다운로드 받고 압축을 해제하면 ords.war 파일이 나오는데 java -jar ords.war 명령어로 구동하면 됩니다. (노란색 음영 표시)
[root@testapp ords_testdb]# cd /home/public_html/dbtool/ords_testdb [root@testapp ords_testdb]# unzip ords.3.0.1.177.18.02.zip[root@testapp ords_testdb]#[root@testapp ords_testdb]# ll합계 96572 drwxr-xr-x 3 root root 4096 2015-06-26 18:02 docs drwxr-xr-x 6 root root 4096 2015-06-26 18:06 examples drwxr-xr-x 2 root root 4096 2015-06-26 18:05 logs -rw-r--r-- 1 root root 52678336 2016-04-04 16:58 ords.3.0.1.177.18.02.zip -rw-r--r-- 1 root root 46155128 2015-06-26 18:05 ords.war drwxr-xr-x 2 root root 4096 2015-06-26 18:05 params -rw-r--r-- 1 root root 29870 2015-06-26 18:06 readme.html[root@testapp ords_testdb]#[root@testapp ords_testdb]# java -jar ords.war install advanced
이 Oracle REST Data Services 인스턴스는 아직 구성되지 않았습니다.
다음 프롬프트에 값을 입력하십시오.
구성 데이터를 저장할 위치를 입력하십시오.:/home/public_html/dbtool/ords_testdb
데이터베이스 서버의 이름을 입력하십시오. [localhost]:192.168.111.10
데이터베이스 수신 포트를 입력하십시오. [1521]:
데이터베이스 서비스 이름을 지정하려면 1을 입력하고, 데이터베이스 SID를 지정하려면 2를 입력하십시오. [1]:2
데이터베이스 SID를 입력하십시오. [xe]:ORATEST
Oracle REST Data Services 스키마를 확인/설치하려면 1을 입력하고, 이 단계를 건너 뛰려면 2를 입력하십시오. [1]:1
ORDS_PUBLIC_USER에 대한 데이터베이스 비밀번호를 입력하십시오.: New Password
비밀번호 확인:
Oracle REST Data Services 스키마를 확인하려면 SYSDBA 권한으로 로그인하십시오. 설치해야 할 수 있습니다.
설치를 확인하려면 SYSDBA 권한을 보유한 사용자 이름을 입력하십시오. [SYS]:
SYS에 대한 데이터베이스 비밀번호를 입력하십시오.:
비밀번호 확인:
4월 04, 2016 6:02:40 오후 oracle.dbtools.rt.config.setup.SchemaSetup addSchemaParams
정보:
Oracle REST Data Services 스키마가 존재하지 않으므로 생성됩니다.
ORDS_METADATA에 대한 기본 테이블스페이스을(를) 입력하십시오. [SYSAUX]:TBS_APEX
ORDS_METADATA에 대한 임시 테이블스페이스을(를) 입력하십시오. [TEMP]:
ORDS_PUBLIC_USER에 대한 기본 테이블스페이스을(를) 입력하십시오. [USERS]:TBS_APEX
ORDS_PUBLIC_USER에 대한 임시 테이블스페이스을(를) 입력하십시오. [TEMP]:
PL/SQL 게이트웨이를 사용하려면 1을 입력하고, 이 단계를 건너 뛰려면 2를 입력하십시오. [1]:2
Application Express RESTful Services 데이터베이스 사용자(APEX_LISTENER, APEX_REST_PUBLIC_USER)에 대한 비밀번호를 지정하려면 1을 입력하고, 이 단계를 건너 뛰려면 2를 입력하십시오. [1]:
APEX_LISTENER에 대한 데이터베이스 비밀번호를 입력하십시오.:
비밀번호 확인:
APEX_REST_PUBLIC_USER에 대한 데이터베이스 비밀번호를 입력하십시오.:
비밀번호 확인:
4월 04, 2016 6:03:20 오후 oracle.dbtools.common.config.file.ConfigurationFilesBase update
정보: Updated configurations: defaults, apex_pu
4월 04, 2016 6:03:20 오후 oracle.dbtools.installer.Installer installORDS
정보:
Oracle REST Data Services 버전 3.0.1.177.18.02을(를) 설치하는 중입니다.
... 로그 파일이 /home/public_html/dbtool/ords_stagedb/logs/ordsinstall_2016-04-04_180320_00126.log에 기록되었습니다.
... 데이터베이스 필요 조건이 확인되었습니다.
... Oracle REST Data Services 스키마가 생성되었습니다.
... Oracle REST Data Services 프록시 사용자가 생성되었습니다.
... Oracle REST Data Services에 권한이 부여되었습니다.
... Oracle REST Data Services 데이터베이스 객체가 생성되었습니다.
4월 04, 2016 6:03:30 오후 oracle.dbtools.installer.Installer installORDS
정보: Oracle REST Data Services 버전 3.0.1.177.18.02 설치가 완료되었습니다. 경과 시간: 00:00:10.396

독립형 모드를 시작하려면 1을 입력하고, 종료하려면 2를 입력하십시오. [1]:1
HTTP 포트를 입력하십시오. [8080]:8081
2016-04-04 18:09:42.586:INFO::main: Logging initialized @51500ms
4월 04, 2016 6:09:42 오후 oracle.dbtools.standalone.StandaloneJetty setupDocRoot
정보: Disabling document root because the specified folder does not exist: /home/public_html/dbtool/ords_stagedb/configdir/ords/standalone/doc_root
2016-04-04 18:09:43.408:INFO:oejs.Server:main: jetty-9.2.z-SNAPSHOT
4월 04, 2016 6:09:43 오후 oracle.dbtools.auth.crypto.CryptoKeysGenerator startup
정보: No encryption key found in configuration, generating key
4월 04, 2016 6:09:43 오후 oracle.dbtools.auth.crypto.CryptoKeysGenerator startup
정보: No mac key found in configuration, generating key
4월 04, 2016 6:09:43 오후 oracle.dbtools.common.config.file.ConfigurationFilesBase update
정보: Updated configurations: defaults
4월 04, 2016 6:09:43 오후 oracle.dbtools.auth.crypto.CryptoKeysGenerator startup
정보: Updated configuration with generated keys
2016-04-04 18:09:43.577:INFO:/ords:main: INFO: Using configuration folder: /home/public_html/dbtool/ords_stagedb/configdir/ords
2016-04-04 18:09:43.577:INFO:/ords:main: FINEST: |ApplicationContext [configurationFolder=/home/public_html/dbtool/ords_stagedb/configdir/ords, services=Application Scope]|
4월 04, 2016 6:09:43 오후 oracle.dbtools.common.config.db.DatabasePools validatePool
정보: Validating pool: apex_pu
4월 04, 2016 6:09:43 오후 oracle.dbtools.common.config.db.DatabasePools validatePool
정보: Pool: apex_pu is correctly configured
2016-04-04 18:09:43.844:INFO:/ords:main: INFO: Oracle REST Data Services initialized|Oracle REST Data Services version : 3.0.1.177.18.02|Oracle REST Data Services server info: jetty/9.2.z-SNAPSHOT|
2016-04-04 18:09:43.846:INFO:oejsh.ContextHandler:main: Started o.e.j.s.ServletContextHandler@313b63e6{/ords,null,AVAILABLE}
2016-04-04 18:09:43.855:INFO:oejs.ServerConnector:main: Started ServerConnector@75338e4c{HTTP/1.1}{0.0.0.0:8081}
2016-04-04 18:09:43.855:INFO:oejs.Server:main: Started @52773ms
입력한 값들은 붉은 색으로 표시하였고 패스워드를 입력해야 하는 부분은 파란색으로 표시 하였습니다.
DB서버 접속정보, ORDS 스키마 생성을 위한 SYS계정 정보, TABLESPACE 정보, 실행포트 등등 입력하라고 하는데 입력한 값들은 설정에 저장되어 이후에 ords.war 를 구동할 때는 입력하지 않고 바로 실행됩니다.
SYS계정 정보는 ORDS스키마를 원격에서 생성하기 위해 일회성으로 입력 받은거라 저장되지 않습니다.
"구성 데이터를 저장할 위치를 입력하십시오.:" 에서 지정한 경로를 보면 ords 라는 디렉토리가 생성되어 있는데 여기에 각종 설정 파일들이 저장되어 있습니다.
그리고 기본 포트는 8080 이지만 기존에 설치하 다른 인스턴스가 8080을 사용중이어서 여기서는 8081 로 설정했습니다.
별다른 에러 정보가 없다면 제대로 구동이 된 것이며 Ctrl+C 로 취소합니다.
ORDS 설치된 다음 DB서버의 스키마 정보를 보면 아래와 같이 ORDS_METADATA, ORDS_PUBLIC_USER 2개의 DB서버에 생성된 것을 볼 수 있습니다.
SQL> select username, created, account_status, lock_date
from dba_users
where created > trunc(sysdate)
order by 2;

USERNAME                  CREATED             ACCOUNT_STATUS                   LOCK_DATE
------------------------- ------------------- -------------------------------- -------------------
APEX_PUBLIC_USER          2016-04-04 17:05:18 OPEN
APEX_050000               2016-04-04 17:05:18 EXPIRED & LOCKED                 2016-04-04 17:07:01
FLOWS_FILES               2016-04-04 17:05:18 EXPIRED & LOCKED                 2016-04-04 17:07:01
APEX_REST_PUBLIC_USER     2016-04-04 20:31:53 OPEN
APEX_LISTENER             2016-04-04 20:31:53 OPEN
ORDS_METADATA             2016-04-04 20:45:22 EXPIRED & LOCKED                 2016-04-04 18:03:22
ORDS_PUBLIC_USER          2016-04-04 20:45:23 OPEN

7 rows selected.
6. ORDS 기타 설정
[root@testapp standalone]#
[root@testapp standalone]# pwd
/home/public_html/dbtool/ords_testdb/ords/standalone
[root@testapp standalone]#
[root@testapp standalone]# ll
합계 8
drwxr-xr-x 3 root root 4096 2016-04-04 20:51 doc_root
-rw-r--r-- 1 root root  230 2016-04-05 14:17 standalone.properties
[root@testapp standalone]#
[root@testapp standalone]# cat standalone.properties
#Tue Apr 05 14:17:29 KST 2016
jetty.port=8081
standalone.context.path=/ords
standalone.doc.root=/home/public_html/dbtool/ords_testdb/ords/standalone/doc_root
standalone.static.context.path=/i
standalone.static.do.not.prompt=true
[root@testapp standalone]#
standalone.perperties 설정 정보에 있는 standalone.doc.root 의 경로 하위에 standalone.static.context.path 에 설정된 디렉토리로 이미지 파일들이 저장되어 있어야 하는데 여기서는 i 로 되어 있습니다.
1번 과정에서 설치한 DB서버의 apex 설치파일 경로에 보면 images 라는 디렉터리가 있는데 이 디렉터리 전체를 아래와 같이 doc_root 밑에 i 라는 이름으로 복사해와야 합니다.
[root@testapp standalone]#
[root@testapp standalone]# cd doc_root
[root@testapp doc_root]#
[root@testapp doc_root]# scp -r 192.168.111.10:/home/oracle/apex_5.0.1/images i
root@192.168.111.10's password:
...
...
...
[root@testapp doc_root]# ll
합계 40
drwxr-xr-x 33 root root 40960 2016-04-04 20:51 i
[root@testapp doc_root]#
conf 에는 DB 접속 정보가 xml 파일로 저장되어 있는데 apex.xml 파일이 없을 경우 아래와 같이 apex_pu.xml 파일을 카피해서 하나 만들어 줍니다.
[root@mptestagapp ords_testdb]#
[root@mptestagapp ords_testdb]# pwd
/home/public_html/dbtool/ords_testdb
[root@mptestagapp ords_testdb]#
[root@mptestagapp ords_testdb]# ll
합계 96704
-rw-r--r-- 1 root root        0 2016-04-05 14:17 derby.log
drwxr-xr-x 3 root root     4096 2015-06-26 18:02 docs
drwxr-xr-x 6 root root     4096 2015-06-26 18:06 examples
drwxr-xr-x 2 root root     4096 2015-06-26 18:05 logs
-rw------- 1 root root   130961 2016-04-08 16:36 nohup.out
drwxr-xr-x 4 root root     4096 2016-04-04 21:32 ords
-rw-r--r-- 1 root root 52678336 2016-04-04 20:48 ords.3.0.1.177.18.02.zip
-rw-r--r-- 1 root root 46155149 2016-04-04 20:49 ords.war
drwxr-xr-x 2 root root     4096 2015-06-26 18:05 params
-rw-r--r-- 1 root root    29870 2015-06-26 18:06 readme.html
[root@mptestagapp ords_testdb]#
[root@mptestagapp ords_testdb]# cd ords
[root@mptestagapp ords]#
[root@mptestagapp ords]# ll
합계 12
drwxr-xr-x 2 root root 4096 2016-04-04 21:32 conf
-rw-r--r-- 1 root root 1618 2016-04-04 21:32 defaults.xml
drwxr-xr-x 3 root root 4096 2016-04-04 20:51 standalone
[root@mptestagapp ords]#
[root@mptestagapp ords]# cd conf
[root@mptestagapp conf]#
[root@mptestagapp conf]# ll
합계 16
-rw-r--r-- 1 root root 325 2016-04-04 20:49 apex_al.xml
-rw-r--r-- 1 root root 328 2016-04-04 20:49 apex_pu.xml
-rw-r--r-- 1 root root 333 2016-04-04 20:49 apex_rt.xml
[root@mptestagapp conf]#
[root@mptestagapp conf]# cp apex_pu.xml apex.xml
[root@mptestagapp conf]#
[root@mptestagapp conf]# ll
합계 16
-rw-r--r-- 1 root root 328 2016-04-04 20:52 apex.xml
-rw-r--r-- 1 root root 325 2016-04-04 20:49 apex_al.xml
-rw-r--r-- 1 root root 328 2016-04-04 20:49 apex_pu.xml
-rw-r--r-- 1 root root 333 2016-04-04 20:49 apex_rt.xml
7. 접속
이제 모든 준비가 끝났고 아래와 같이 백그라운드로 구동 시키면 됩니다.
[root@testapp ords_testdb]# nohup java -jar /home/public_html/dbtool/ords_testdb/ords.war &
[1] 19079
[root@testapp ords_testdb]# nohup: ignoring input and appending output to `nohup.out'
[root@testapp ords_testdb]#
[root@testapp ords_testdb]#
[root@testapp ords_testdb]# ps -ef | grep ords
root     19079 49445 99 18:24 pts/3    00:00:04 java -jar /home/public_html/dbtool/ords_testdb/ords.war
root     19346 49445  0 18:24 pts/3    00:00:00 grep ords
http://host:8081 로 접속하여 아래와 같이 페이지가 제대로 뜨는지 확인합니다.

<참고>
Application Express Installation Guide
REST Data Services Installation and Configuration Guide
Oracle Application Express Troubleshooting